17 October 2015

Yeah, It's Meatloaf.


Yeah, it's meatloaf...  So, I never really liked meatloaf till my Granny Hilda made hers.  It made its own gravy.  I have that stored in my brain, but this isn't it.  This is MY recipe, with some hints of hers in it.  And as always... no exact measurements here... cause that is how I roll.  You may not like everything about mine ... so add something you like to it and take away what you don't like.  Make it yours.... 

What you will need for my recipe:

VEGGIES!  What I used:  1 Small Yellow Squash
                                           1 Small Zucchini
                                           1 Medium Carrot
                                           Shred these veggies.
                                           1 Medium Onion, diced
                                           2 HUGE Cloves of Garlic, minced
                                           1 Jar of Diced Pimentos 

You are going to saute' these veggies until they are tender in a little olive oil or butter, let them cool.

I added some of my "sauce" to the veg mixture.

Also, while sauteing ... take a 16 oz can or larger, of tomato puree or crushed tomatoes and add balsamic vinegar ( I used balsamic ketchup) and Heinz 57... add just a little at a time until it is tangy... let it come up to a boil.  Set it aside to cool. 

Next up, hamburger.  I used about a pound and a half to the veggies I used.  I used a LEAN hamburger.  You can use whatever is on sale.  If the higher fat content is on sale, use a pan that can handle all the fat that is going to come out of it.

I used one beaten extra large egg, even though my grandmother NEVER used eggs.  I also added 2 crumbled up biscuits.  Yes, biscuits.  That is what she used and that is what I use.  Now as you mix this, add some of the "sauce" you made up (make it moist but not overly moist, you need to be able to shape these loaves).  Also add a little celery salt and black pepper. 


If you have doubts about seasoning, take a little bit of the mix and cook it in a pan... taste it.

Once it is all mixed, chill it for a little bit so free hand shaping will be easier.  I never use a loaf pan of any kind.

I used a foil lined baking sheet and free formed 2 loaves.  Bake at 350 F for about 45 minutes.  Then, add sauce to the top and bake for 30 to 45 minutes.  You will know it is done when the internal temperature is 160 F.  


Serve sauce on the side as well.  


04 October 2015

Simple Peanut Butter Cookies


These cookies are so simple that anyone, any age could make them... and this is what you will need:

1 cup peanut butter
1 cup sugar
1 egg
1/4 tsp vanilla

Simple, right (and yes, NO flour)???

So I mix the sugar, vanilla and egg together then add the peanut butter.  It is so simple you can do it with just a big mixing spoon.  

Preheat that oven to 350 degrees (I used my toaster oven to bake these cookies).  Parchment paper on your baking sheet or pan... if no parchment, foil the pan and spray or butter it.  Next... make cookie dough balls or scoops if you have them.  Whatever size you want.  These cookies do not spread very much, so keep that in mind.  Once they are on the pan, press them with your hands so they won't dome up, take a fork and make a criss-cross design, if you want to.  Baking time may vary depending on whether you want really soft cookies or more firm and darker brown cookies.  It doesn't take long to bake these, so don't walk away for more than 5-10 minutes....  

This recipe made 12-15 cookies for me.  And it is so easy to double or triple... etc.  I added vanilla because it seemed to enhance the flavor of the cookies.

Good luck and enjoy!!!


02 May 2015

Ground Beef Burgers on a Tight Budget.

Let's face it, most of us cannot afford beef these days.  Hamburger is outrageously priced.  So, here is what I do with it, when I can afford it.

I prefer a leaner hamburger, but 73/27 and 80/20 are going to be cheaper, YET, if you cook them in a pan, all you have left behind is water and fat.  Believe it or not, I have seen the same out of 90/10 hamburger as well.  I think most chain grocery stores probably label the hamburger all the same, sometimes.  The only way you will know what you really have is if you grind it yourself or actually see your butcher grind it.  But this is for those of us who have to depend on chain grocery stores.

This is for a pound of 80/20.

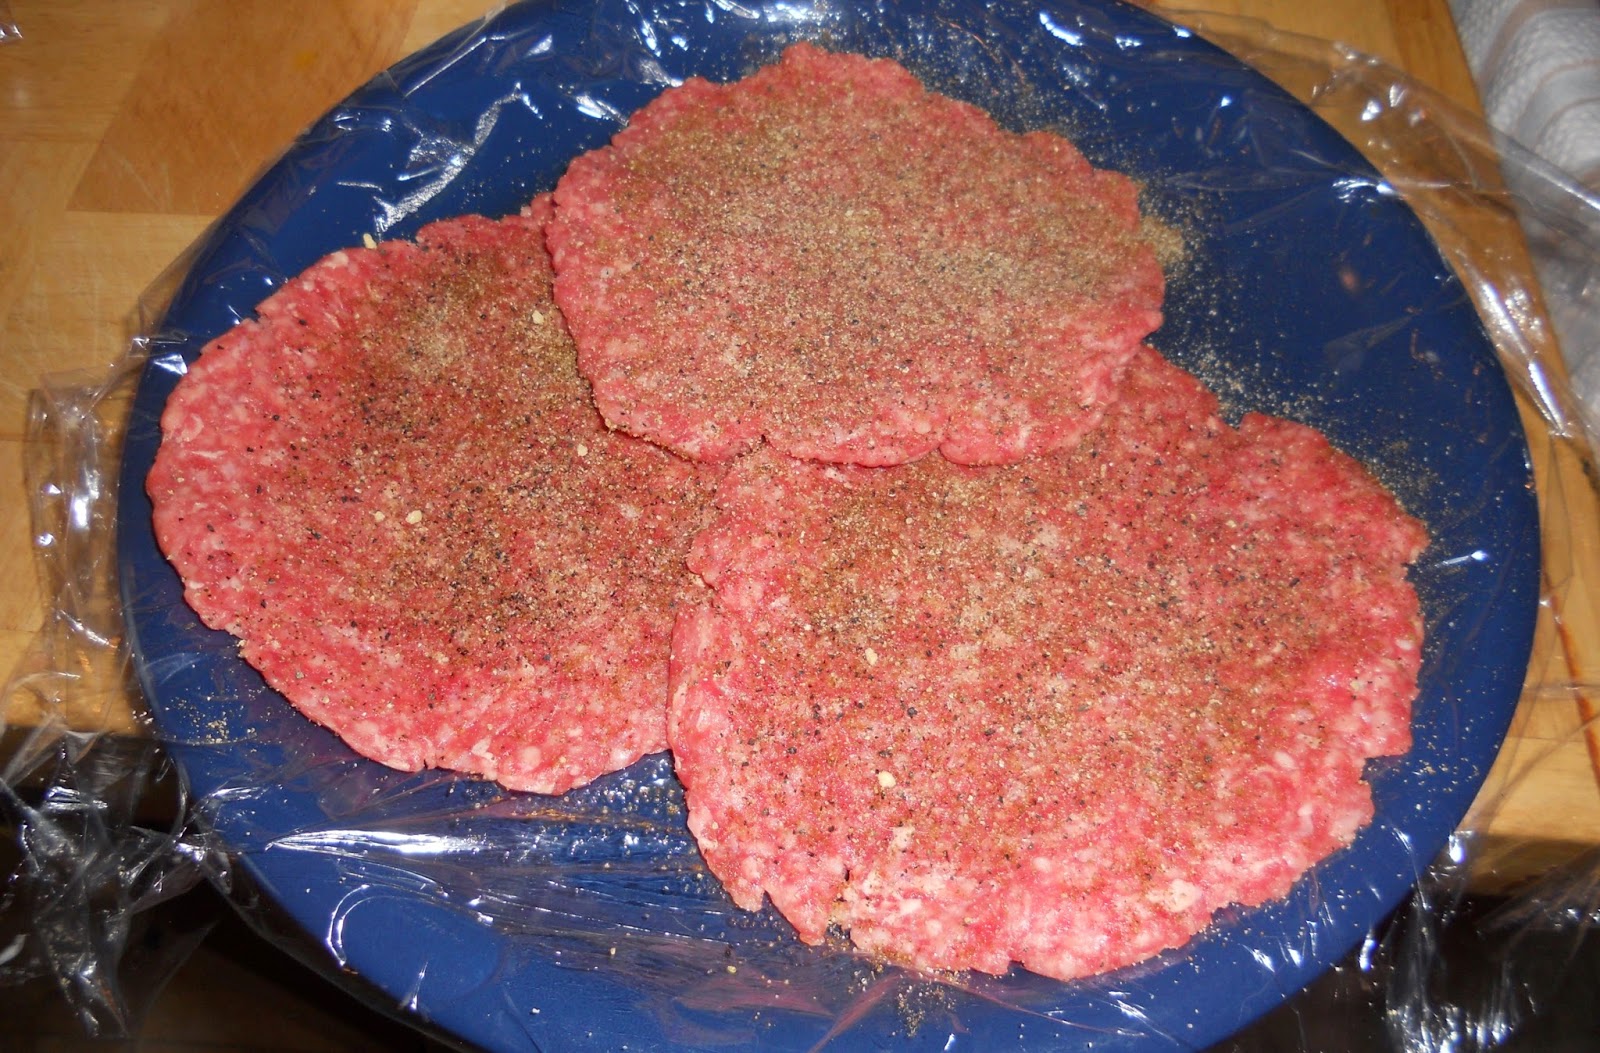
In the pictures I used one clean plate, plastic wrap, cooking spray and seasonings.

Limit the amount of time you use "working" the hamburger.  The more you work it, the more tough it can get.  My amount was perfect in the package so I made it into a log very quickly and pinched off a little more than golf ball sized balls.


Place your hamburger ball on a sheet of plastic wrap.  You should be able to fold it over the hamburger, leave space in the fold for expanding and shaping.  Now you will press out the hamburger, moving it around as you go, to make a circle.  Spread it out as thin as you would like, trying to keep its shape.  (I am making mine for "loaf bread" LOL).


Now that you have done this, place this onto your plate that you have put plastic wrap on and sprayed the wrap with just a little cooking spray so it will not pull apart your hamburger when you go to take it off.  Then, you will sprinkle your seasonings (I used celery salt, onion powder and ground black pepper) onto ONE side of the patty.


I take the edges of the plastic wrap and cover my first layer.  Then, I will put another layer, if I have one on top, adding a piece of plastic wrap to cover it all, and place this in the fridge to get to know the seasonings for a little bit before grilling.

So, after you let this chill out for a bit, perhaps 30 minutes to overnight if you want to, place your patty SEASONED side up, if there is one and cook it to your desired level of done.

Please keep in mind you can do these patties to your desired thickness.  The way I have shown here is less mess and everything can be tossed and the plate can be used for the done ones being the raw meat did not touch the plate.  Also, you can use whatever seasonings you like, even mix them up into the meat prior to making them into the balls.

You can also put the whole pound into a gallon sized zip bag, flatten it out to your desired thickness..... cut the bag down the seems then make your patties square.  I love that trick.  Great way to make quick sliders!

I hope that this helps someone out there!


10 April 2015

Pork In Verde Salsa

So here is my version of Pork in Verde Salsa.

The boyfriend had brought home a pork loin.  By the time I was done breaking it down into a small roast and chops, I had a piece that wasn't really fit for roasting or pork chops.  It was about a pound or so.  I labeled it "for tacos" and put it in the freezer.

Well, I am always shopping for clearance items and trying to be frugal... we can't always afford shopping at the Fresh Market and such.  I ran across Herdez Verde Salsa for under a dollar on clearance and I wanted to try it.

Now, I had a reason to use it.  And with the help of another item found on clearance, Ortega's Green Chiles, I was able to make my Pork in Verde Salsa.


I used a 5 quart dutch oven for this.  I wanted to have room for browning the meat.

In this pot I used about a tablespoon of bacon fat for a little flavor and to help with the browning.  I cut the pork into chunks.  Browned them, drained some of the fat leaving behind probably about a tablespoon or so.  I added diced, fresh garlic, diced onion, about a teaspoon of cumin and ground corriander, to your tastes red pepper flakes, black pepper and just about 1/8 of teaspoon of salt.  I let this mingle in the fat until I could smell it then mixed it into the meat.  I added the green chiles, then the jar of salsa.  I made sure as I stirred that I scraped the bottom getting all the fond off of the pot. It was a little on the thick side so I added just a little water.  You could add low sodium chicken broth if you wanted to, but just add enough liquid to thin it just a bit.  This should cook down to form something that looks like a thick stew.

I let it simmer for about 90 minutes.  Keep an eye on it, it could stick.  For me, 90 minutes was long enough to make the meat tender.  I let it cool a little and I removed some of the "sauce."  I shredded the meat.

So for assembly, I used corn tortillas, Monterey Jack cheese (shredded), cilantro, chopped green onion.  This stuff turned out better than what I thought it would.  So here is a picture of the finished product.


If you decide to try this, let me know how it turns out.  

You could probably brown your meat really well and put all the ingredients in a crock pot and let it go all day.  Serve it over rice if you didn't want to make tacos.  Or use it in tortillas and make enchiladas.  Or just put it in bowl, top it with what I used for this and eat it like chili.  I am really glad I tried this out.  Maybe next time I will do it from complete scratch with fresh tomatillos and all.  This suffices for now though!


01 March 2015

Banana Waffles

I just really wanted to incorporate bananas into my batter.  I didn't want to do anything fancy or with nuts added.  So... this is what I did:


2 Cups of a baking mix (in my case, I used Bisquick cause I got a cheap cheap deal on it).
2 Tbsp of Veggie Oil
1 egg
1 1/3 Cups of Buttermilk
2 Tbsp of Brown Sugar
1 Banana, mashed
Just a dash, less than 1/8th of a teaspoon of Vanilla extract

I started out with one banana, smashed it with a fork in my bowl.  This will make it almost into a liquid, especially when you add your sugar to it.  Add your vanilla.  Then blend in your egg and a cup of your buttermilk. NOW... add 1/2 cup at a time of your baking mix ... until you reach a thick, brownie batter consistency.  Use that 1/3 of buttermilk if it is too thick.  (If you want pancakes, thin it out to like a cake batter consistency).

Depending on what kind of waffle maker you have, prep it for use by the directions or however you have been doing it all along.  For my waffle maker, it takes about 1/3 of a cup to 1/2 to fill each square.  Cook by the directions or till it is done to the level you wish.

The way I made them, it made 4 perfectly filled out squares.  And, probably the best waffle I have made in this waffle maker... I did add a few blueberries to my waffles, made them even better!

And if you really like nutmeg, clove or cinnamon that might even make a great addition as well!

07 July 2014

Frittata or Crustless Quiche MINIs

1 mini muffin pan (makes 12)
Aluminum Foil

Little oven set at 350F.

Ingredients:

Veggies (whatever you want, but please drain spinach really well if you use frozen, in fact, if you get fresh, cook it separately and squeeze the water out of it).  In the picture:
Mushroom
Onion
Tomato
Ham
(about a quarter cup of each, diced)
Cheese (I used a "sandwich" slice of Cracker Barrel SHARP cut into 12 pieces... I didn't want it too cheesy).  But maybe a quarter cup of cheese, whatever you like.

I put the veg and ham plus about a tablespoon or less of butter, salt and pepper into a foil pack and put it on my hot grill and pressed it down.  (Remember, still cooking without a proper kitchen here).  I cooked this until onions were a bit translucent.


In my measuring cup, I have 4 large eggs, 1/2 can of evaporated milk, pinches of salt and... red pepper all beat up.  (You will have a little egg mixture left over... probably enough for 3 MINIs).  

Take your VEG mixture and place into greased mini tin.  Place cheese on top.  Pour egg mix over and you can fill it to the top.  Eggs will rise a bit but it won't "boil over."


Bake for however long it takes for the egg to set in the middle.  When it stops jiggling... they are done.  Pull them out because they will keep cooking...  You can also check with a toothpick... comes out clean.. you are good.  If you want a little underdone... up to you.  And the toothpick may have cheese stuck to it too... so keep that in mind when you check them.  I would say.... after about 8 minutes... start checking.  I turned my pan around midway just because it is a little oven.


These could be done in a bigger muffin pan, if you wanted to.  I would imagine this would make... possibly 6 muffin sized ... not sure.  If I test it out, I will let you all know.

Being they are bite sized... they could be used as appetizers.  They could be put on a salad.  They could be put on toast.  Probably a lot more things you could do with them.... 

I wanted eggs this morning... and this was perfect.  

If you try this out..... let me know!  

THANKS!!!!


27 June 2014

Indoor Grill Suggestions.


This is something that will be on going... be sure to check for new suggestions from time to time.


HAM "CHIPS"

This is country ham.  It is cured typically in a "smoke house"... salty too.  For those of us that are familiar... this little package is "chips" of country ham.  I am not promoting any particular brand... this happened to be buy one get one so I tried it.  Pretty decent.  But if you will take a look... even though it is bits and pieces... the pieces are pretty big once you break down the package.  Perfect for the grill.  I have also lined a pan with foil and sprayed with cooking spray.... popped it in the little oven on 350 until it is the desired level of done you want.  It is preserved... but you may want it browned.  Anyway... being it is not the best thing in the world for you...  I prefer to buy it this way.  You get that taste you want.  I have used these pieces in WRAPS... a little tomato, lettuce, onion and ranch dressing... YUM!


25 June 2014

My Chicken Meatballs.


CHICKEN MEATBALL 

I did this not too long ago and cannot wait to do it again.  I had not used ground chicken before and it was on special ... so I said... now is a good time.  So, I walked around the grocery store and really took everything in ... and came up with this.  And let me just say... I did use a jarred Alfredo sauce.  You can use your own or jarred... just use an Alfredo type for the sauce.  

As usual... no measurements.

Here are the ingredients I used:

Perdue Ground Chicken.
Sun dried tomato strips, not in oil, but if you want to use them, it is okay...
Spinach, fresh (frozen is fine too, just thaw and squeeze the water out).
Garlic.... crushed .. minced.. whatever ... it needs to be FINE.
1 egg.
Italian style bread crumbs.
Parmesan cheese.
1 can petite diced tomatoes (optional)
Mushrooms ... fresh or jarred, it is up to you.  If you use fresh, saute them before you use them in the sauce.
1-2 jars of mushroom Alfredo.
You can use ANY pasta you like... I chose radiatore because it has a lot of ridges to catch the sauce.

Alright... here we go...

Saute your sun dried tomato, spinach and garlic together.  Use olive oil or even butter being a little extra fat in ground chicken is NOT going to hurt.  Set it aside and let it cool.

Once cool, mix half of it with your ground chicken, egg... now... on the bread crumbs and cheese... use enough to not dry out your mix.  You want it to stay sticky and moist.  Add a little at a time.  Now... I covered this and chilled it for about 30 minutes being it was so sticky.  This gives time for the flavors to mingle and for it to rest.

Now, you are going to make it into balls.  You can make them whatever size you want.  I would compare mine to perhaps ping pong ball size!  Once they are rolled... let them rest again.  Use a non stick pan to cook them in.  OR you could put them in a baking dish or on a sheet pan and bake them.  Try 350 until you check temperature... 170 for done.  I would pull them out around 160 because they are going to cook in the sauce for a little while.

So while you are doing all this...  use your pot that the sauce is going to be in... saute your chopped mushrooms until they are lightly browned, butter or olive oil... or both ... up to you.  Season them with salt and pepper.  Once they have got the color you desire... add the rest of the mix to that.  Warm it up with the mushrooms.  Add your sauce.  Pinch of nutmeg ... not in the ingredients but it does make a little bit of difference.  NOW..... add your meatballs...  let them cook for about 10 minutes...  ADD the can of tomatoes... sounds weird... I know... but try it... it really makes this sauce pop.  Now... let this cook... you can check the temp of your meatballs again if you want...  

Get your pasta going... you know what to do... lots of water, lots of salt, lots of boiling... follow the directions of the package... unless you are making your own pasta.  Something I have not attempted yet.... but it is on my to do list....... 

So once your pasta is done... you can either mix it up with your sauce or serve it on top.  

I think everyone has their own preferences... 

But... if anyone has any questions.... please feel free to just ask or even comment.  

Thanks!!!!!

L.

PS:  If you are feeling really creative... instead of turning it into a meatball, make it into a patty.  Grill it.  Top it with your "mix."  Maybe add your fave cheese... perhaps mozzarella, provolone or even a blue cheese.  Really thinking about this for myself... if I do it... I will definitely post it!


24 June 2014

Grill Meal Number 2.


Okay, here is Grill Meal number 2... the beginning.  

In the picture:  Fresh string beans, fresh mushrooms and "rib eye" pork chops that had been marked down to like $2.93.  Also there will be onion grilled.  Thinking... green bean casserole... deconstructed.  Ha ha!  Or ... grilled green bean casserole.  

So.. here are the before and after of the grilled beans.  I tossed them with a little sea salt, pepper, olive oil and just a dash of soy sauce.  Then splashed a little soy sauce during the cooking.


Pork chops are seasoned with a splash of soy sauce, cayenne pepper, sea salt and olive oil.


And here it is all on a plate.....


If you have only eaten string beans to go through the motions.... or just in string bean casserole.... you should try them grilled.  OMG...  I love them.  I want more.

Yes... that is mac n cheese in the picture.  It is one of those microwavable "cups."  I also like the frozen mac n cheese in a pinch.  Sometimes you got to do what you got to do when you don't have a proper kitchen! 

I really hope this helps any of you out there that need some ideas for dinners when you have limited kitchen equipment.


15 June 2014

Cooking Without A Proper Kitchen.

*****Note: It did finally get cabinets and nice tile cabinet tops. But this relationship is no more and I am super happy it has been over since 2016. If your partner, significant other, spouse wants you to move into something that was even more unfinished than just this kitchen...run.  There are other things coming that are going to be unfinished in the relationship.  And that is all I am going to say on that. BUT the tips still are valid. Maybe you have a tiny house or a camper or dorm room or just a room...these suggestions can work well for you.*****

Since May 2014, when we moved into this "project home" my boyfriend is working on... I have not had a kitchen.  I have no cabinets, no counters, no stove.   (You say... what about a grill?  That is a project too, that needs new burners)!

What I do have is my microwave, a decent, large toaster oven, a crock pot and new to the cooking scene here... a George Foreman grill.  *A new edition:  Showtime Rotisserie that my boyfriend picked up for $15.00... never used.  Some of the stuff still in packaging.

So, my posts are now going to be ... how in the world do I actually cook and have a decent meal in these surroundings.... And this may also help those who live in a dorm or rent just a room or travels around in a camper ...

Tonight's menu is going to be grilled veggies:  yellow squash, zucchini, onion and mushrooms.  Also included... grilled steak.  Sounds pretty elementary.  But considering that we have been eating mostly frozen or instant kind of food... this is totally gourmet for this meal!  :-)

Here are some pics:

My "kitchen."


My "grill."


Dinner.


I will try to take pics as I cook so we can all see how this is gonna turn out.


So far... so good.  I am using an olive oil canola oil blend, sea salt and freshly ground pepper for seasoning on everything.


Okay... finished product.  It is a little past the rare I like... I think rare is probably hard to do on a grill such as this, but it is good enough.  I could probably leave it open next time and just cook one side at a time to get the desired cook on it that I like.

Now... do I turn this into a ramen noodle bowl?  A rice bowl?  Or just leave it as is and enjoy?  


Pictures of other equipment:


7 Quart Crock Pot

I have had this "toaster" oven for YEARS.  I have not used the rotisserie feature on it.
I have baked cakes, pies and even muffins in it.  Shake n Bake drumettes and pork chops.  
You can do A LOT of stuff with this model.


Please don't laugh... this is an ancient model of microwave.  It was my Mom and Dad's.  They are no longer here.  I do the very basics in this.


Newest edition thanks to my boyfriend.  $15.00 Showtime Rotisserie, never used.


14 May 2014

Japanese Steakhouse Style Noodle Bowl.

Japanese Steakhouse style noodle bowl.

2-4 Ramen noodle packs.  Your choice of flavors.  Mine:  I typically go with Oriental and whatever protein I am using.

1-2 bags each of Bird's Eye Steambag Asian Style Veg and a broccoli.  Or any veg you would like steambag, fresh or otherwise.

Meat of your choice.  Marinated or not... it is up to you.  I typically use Denver, Chuck Eye steak or boneless beef rib... tender and cheap.  Flank steak would be awesome in this.

You can use some of your seasoning pack from your noodles for a marinade... if you like.  If you want a quick marinade... go with soy sauce, sriracha, garlic, a little olive oil and just a touch of ginger.  Marinate at least 2 hours prior and pat your protein dry before you cook it.  Browns a whole lot better....

I would probably do the protein first (grill, grill pan or saute) and let it be resting while you do the noodles and veg.

Fix those noodles by the directions on the package.. but just use seasoning packets for LIGHT seasoning of the noodles.  If you have any packs left over.... FINE.  Use as a seasoning for the veg and a marinade for the meat.

Thaw the veg in microwave or just put it in a hot pan frozen, fresh or whatever...  pan should have sauteed garlic and onion with a little soy sauce and maybe sriracha in it.  Fresh veg would be great... but if you don't have time for all the prep work .... this works really well for something quick.

Cook this until it is like YOU want it.

Assemble.  Bowl.  Noodles.  Veg.  Thinly slice protein on top.  Splash of soy sauce if you like on top.

1 package of ramen feeds one person, typically.
1 bag of veg might feed 2 people.  So you do the math on how many you would like to try this on and adjust accordingly.

I typically prep 3 noodles, 3 bags veg and about a pound of meat.... for 2 people.  I like more veg and he likes more meat.

01 October 2013

Plates of Food, Out and About.

Some of these pictures are going to be from Girl's Night Out with my cousin.
Some are from actual date nights with my boyfriend.
Some are trip food.


Nutella Cheesecake.  This was at Marabella's in "little" Washington, NC.

Garlic knots at Marabella's.  

My FIRST ever Sushi.  Not a big fan of what is left on the plate.
I do love Spicy Tuna and Spicy Salmon Rolls.


Pat's King Of Steaks and Geno's in Philadelphia PA.  
We preferred Geno's.  Pat's was a little dry.

Sam and Steve's House Of Beef in Newport News, VA.
This is their "Greek Hamburger Steak" (rare).
Looks like a hot mess.. but it is delicious.

Another fave in Newport News, VA...
Gus' Hot Dog King.

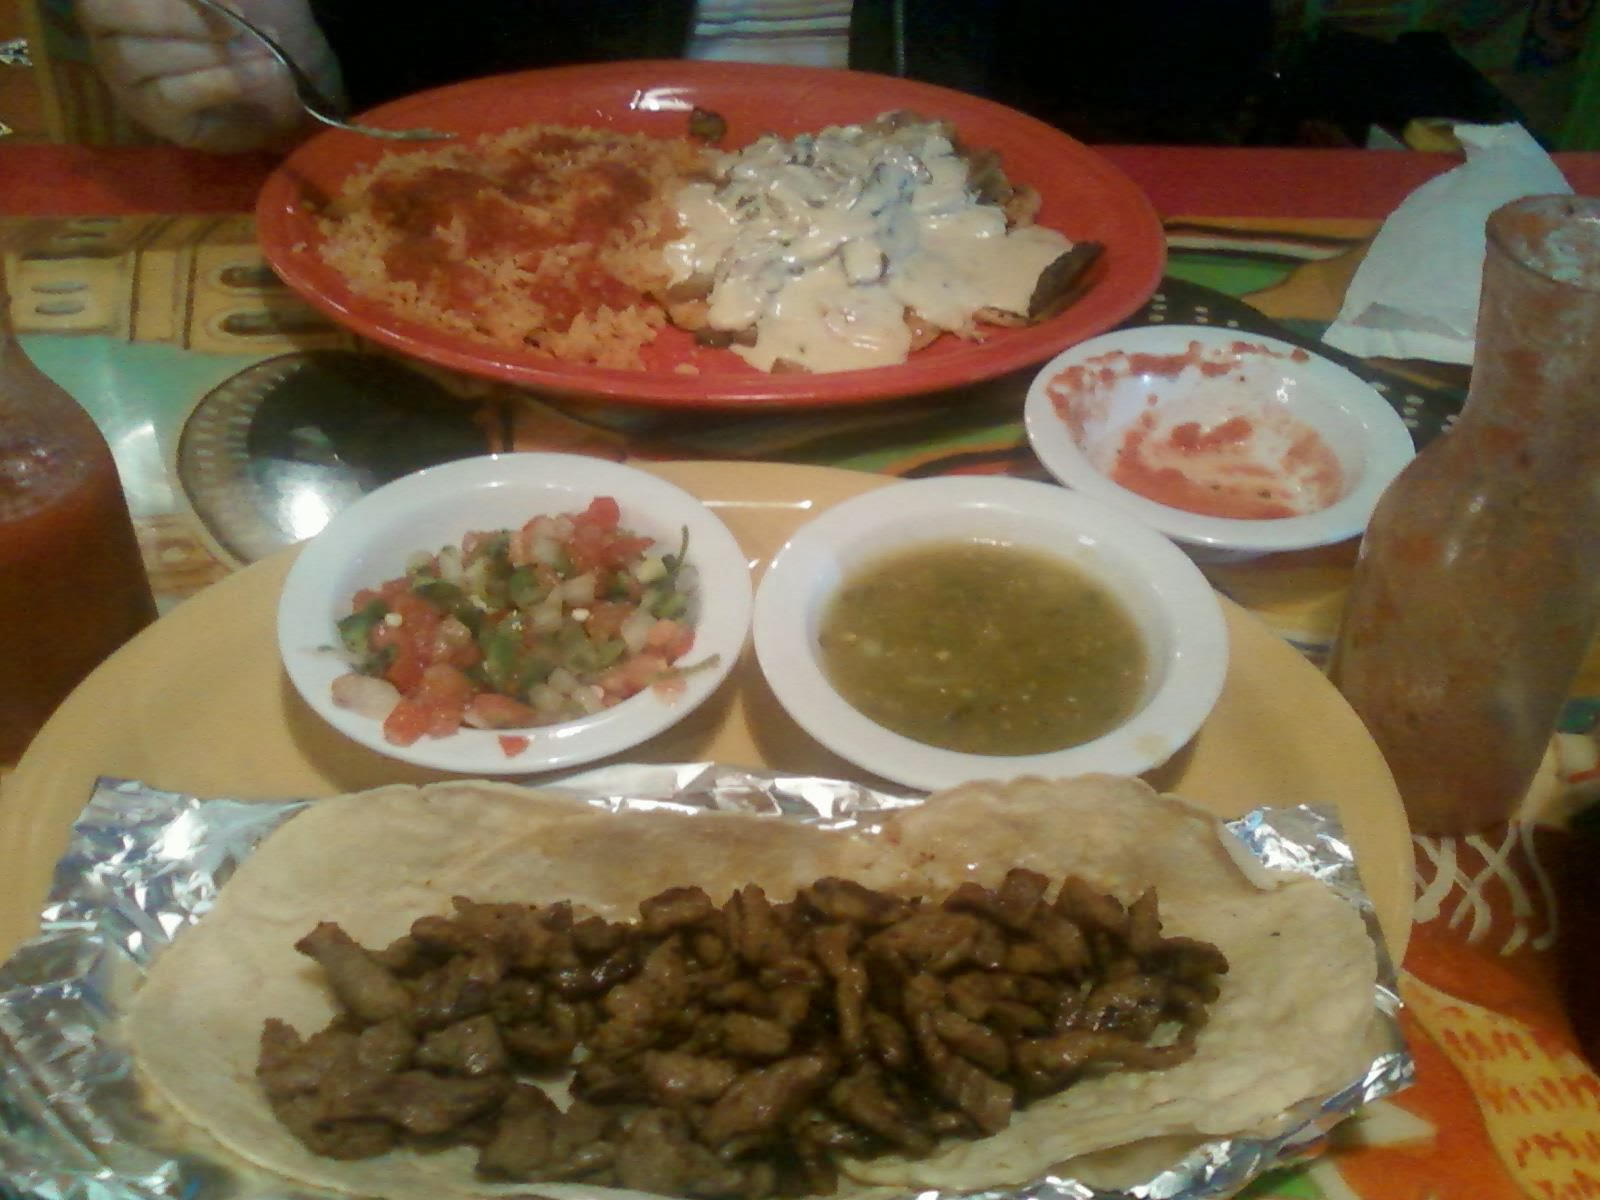
El Tapitio's in "little" Washington.
My favorite Mexican Restaurant in the area.

Spanky's on OBX.
Really great place for fast food!

Jack's Tavern in "little" Washington
SCOTCH EGGS!!!!  YUM!!!


Sriracha is LIFE! Love the ROOSTER!!!! :-)


Here is just an idea I tried out... as I am sure MANY of you have.  Recently I discovered "Rooster Sauce."  I have known about it for years... used it before... but have developed an absolute love for it in the past few months.

Sriracha sauce is basically a hot sauce made from chilies and garlic.  Here is what I have been doing... as per usual with me.. no measuring.

Over a low to medium heat, place olive oil or canola oil in a pan or pot... just enough for the amount of garlic you wish to have in this sauce... I mince or use garlic press for the garlic...  let this cook... slowly ... do not let it brown..... then... add your sriracha sauce to your taste, let it kind of meld all together... then add soy sauce to make it, well... saucy.  This stuff is really good on... ANYTHING.  Steamed/fried dumplings from your fave Chinese take out or out of the freezer section.  STEAK... this sauce is good to dip steak into.  I could go on about the sauce, but I think you all know the deal here.

Next sauce.  Soy sauce, sriracha, brown sugar and applesauce.  Yeah... I typed applesauce.  Sounds crazy.  I take boneless pork chop and brown them, remove from pan.  Add the ingredients for the sauce and let it cook a minute... put the chops back in and let it reduce all together.  It makes a great BBQ sauce.  It isn't too sweet and it isn't too spicy.

Today... I have been craving, of all things... french fries and gravy.  Well I made fries.  But decided to make ranch dressing.  So while I was making the dressing (and I make it with HVR's powder but I just use buttermilk and mayo to the consistency and flavor I want with a bit of fresh ground pepper, nothing special)... and I said to myself... "What if I add sriracha to this??"  Well... I did a small amount test... and OMG it was awesome...  So I made enough to dip my fries in.  I even added a dash of soy sauce.  I licked the bowl.  I think this would be a good thing to make chicken salad out of or put as a spread on a sandwich ... or mix into some pimento cheese.  YUM!

I realize that perhaps all of you out there have quite possibly done the same thing.  If you have any other ideas, please share!  Right now... I do believe I could eat the sriracha sauce on nearly anything!

Thanks for reading!  L.

31 March 2013

Pork BBQ

Have not been experimenting a lot of late...  but this is the first time I have ever made BBQ.

Here we go:

1  4-6 lbs  butt or shoulder  (I used a 6.5 lb butt)

Rub it with this: 

2.5 TBSP  Brown Sugar
1.5 TBSP Paprika
1    TBSP Fresh Ground Black Pepper
3    TSP  Salt
****I add these to this rub ... for my own tastes:  2 TSP EACH Garlic and Onion Powders.  1/8 TSP of Cayenne.
Mix these all together... rub your meat with this ALL OVER.  After you have rubbed it, take a little liquid smoke, up to about 1 TBSP and lightly pat it over the meat.  I put a little in my hand and literally PAT it onto the meat, after it has been rubbed.  Wrap this in plastic wrap and place in fridge for about 8 hours or longer.

Once your meat has sat around for 8 hours...

We want to put this meat in the middle of the oven...  500 degrees!  Place it in a pan on a rack.  Roast this up to 45 minutes until it is a brownness you can live with.  So while you wait... get the 6-8 quart slow cooker ready.

Place onions and carrots down on the bottom to make a "rack.".... 

Stir up:  (This sauce is a work in progress, but this was what I used the first time).

1  Cup Apple Cider Vinegar
1/3 Cup Worcestershire Sauce
A few drops of your favorite hot sauce (to taste)
1 TBSP  Red Pepper Flakes
1/2 TSP Dry Mustard
1/2 TSP Garlic Powder
1/2 TSP Onion Powder
1/4 TSP Cayenne
2 TSP Sugar
1 TSP Brown Sugar
A couple of drops of your liquid smoke (not too much)!

Now add 1/2 cup of Chicken Broth and 1/2 cup of your sauce to slow cooker.  (Add this first before you add your meat)!  Place your meat on your veggie rack in slow cooker.

Set on low for about 6 hours.  That is how long it took for mine.  So if it goes for 7-8 no biggie... just be hard to get it out of cooker.  You will DISCARD the veggie.  Save the juice if you want.  I didn't use it.  I just pulled my pork and drizzled the rest of the sauce to my taste over the meat.

Served with BBQ potatoes which I have NEVER used canned potatoes before, but decided to today.  My sauce was (in steps)  bacon grease, chopped onion... cooked till soft in grease, added some of the liquid from the potatoes, added ketchup to my taste, dashes of hot sauce,  2 TBSP of my sauce I made... let it cook and tasted to make sure it was where I wanted it... then put the potatoes in.  Let boil for just a few minutes.  Let them sit for about 15 minutes prior to serving.  They should still be warm and had enough time to absorb sauce.

I made coleslaw but everyone has their own recipe for their own usually.  And I don't measure for that anyway... I do all to taste.

And... I did a can of baked beans... yes... a can.  Sad... I know... but they were good.  :-)


Not the prettiest picture in the world, I know...

13 October 2012